No-Sew Flannel Shirt Upcycle to DIY Coffee Cup Cozy Sleeve
This post may contain affiliate links, which means I’ll receive a commission if you purchase through my links, at no extra cost to you. Please read full disclosure for more information.
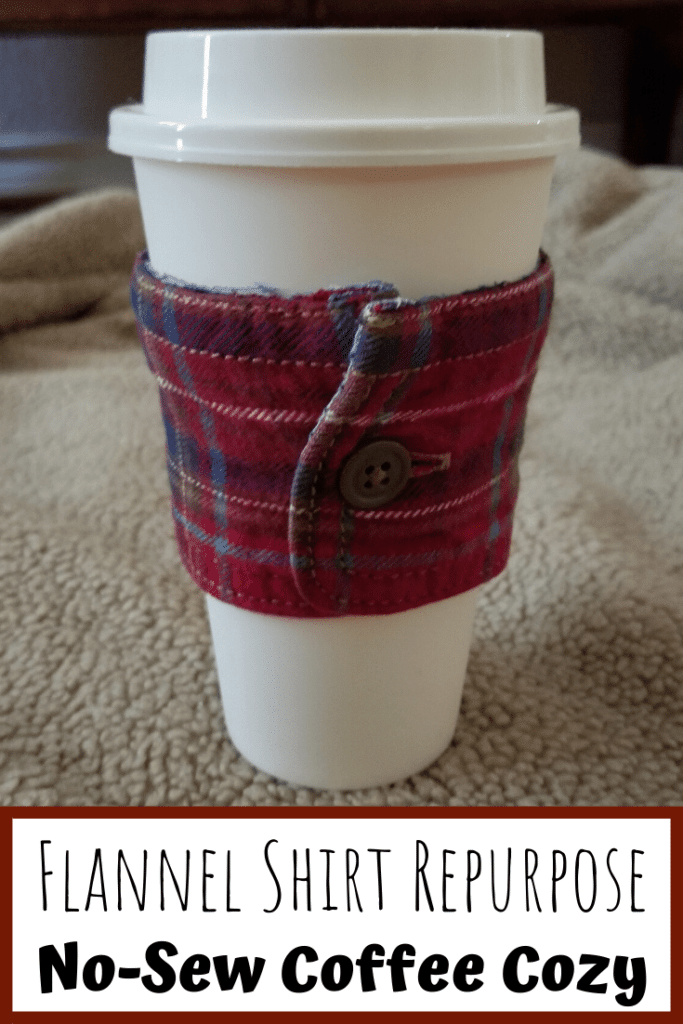
Upcycling and repurposing old shirts is a fun passion of mine! Today, I’m going to show you how to make a no-sew DIY coffee cup sleeve out of an old men’s flannel shirt. This project takes less than 5 minutes to craft and is a great free way to make your own coffee sleeve.

I’ve been repurposing parts of my husband’s old flannel shirt over the course of these last few months. Check out the flannel shirt repurposing projects I’ve done so far if you’re looking for ways to reuse your old flannels:
- DIY chapstick keychain holder
- Flannel lavender sachet
- Make a DIY drawstring bag out of a shirt sleeve
- DIY flannel Christmas gift tags
This fun DIY coffee cozy is perfect for this great Fall weather. My husband loves to put his coffee sleeve on as he takes his coffee cup to work. There’s also something very festive about having a coffee sleeve around a tasty pumpkin spice latte! (We make ours at home now that we’ve finally invested in a Keurig.)
So, read on for the full (and very easy) tutorial!
DIY Coffee Sleeve Materials:

Here’s what you need to gather for this project. Just two items!
- Old flannel shirt with a nice cuff and button
- Scissors
How to Make A No-Sew Cozy Sleeve
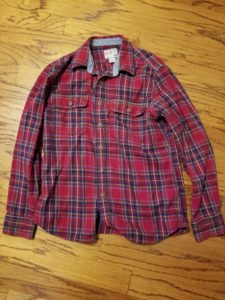
First, make sure you have a good flannel shirt. You want one that has a fairly thick, firm cuff and also at least one button where the sides overlap. The cuff also needs to be a size that’s going to fit around a coffee cup or you’ll have to do a little sewing. I used a size large men’s flannel shirt, which was a perfect fit! Make sure the cuff is not wrinkled as well. If it is, you may want to iron it first.
Since this is a no-sew project, there isn’t much to it!
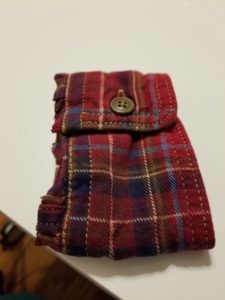
All you need to do is use a nice pair of sharp sewing scissors to cut directly on the line between the cuff and the shirt sleeve. You’ll want to trim any threads that are hanging out and make the cut even. I made a rough cut first along the sleeve with my big sewing scissors and then neatened it up with some embroidery scissors.


If you’d like, you can use some fray check to keep the fabric from unraveling. That is going to make things a bit firmer and a little less cozy on that end though.
After the cozy is done, check out the size of the sleeve. If it’s too small or big, you may need to let it out or take it in a bit with your sewing machine.
If you want to stitch along the inside of the sleeve, you can make a straight stitch parallel to the edge of the cuff. I think having just the button and the open edge is a nice touch. You can also use hem tape, which is my best friend sometimes when I don’t want to have to test my sewing machine on thick layers!
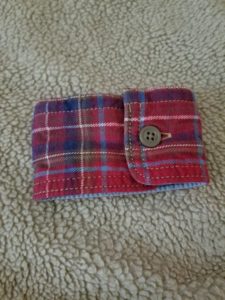
Here are a few pictures of the finished DIY coffee sleeve!
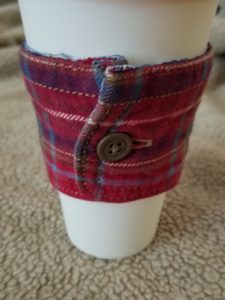

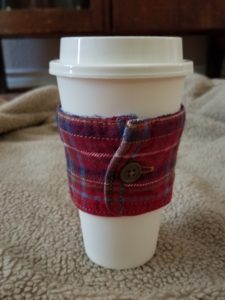

I hope you, too, grin next time you go out with your coffee cup ensconced in this comfy cozy. My husband definitely does!
Happy Fall!