DIY One Onesie for Baby’s First Birthday Using Iron-Ons
ByAlyLast updated:
This post may contain affiliate links, which means I’ll receive a commission if you purchase through my links, at no extra cost to you. Please read full disclosure for more information.
For baby’s first birthday, I wanted to make sure that baby girl looked as cute as possible. I was mainly just wanting pictures for the memories. I’m very nostalgic with this sort of stuff. They only turn one once! Even though we kept it small, with only family, I wanted it to be great. I’ve seen so many different ideas online for a first birthday outfit. However, I knew she was only going to wear it once so I did not want to spend too much money on it. So, I decided to make a DIY one onesie myself. It was fun to do and super cheap.
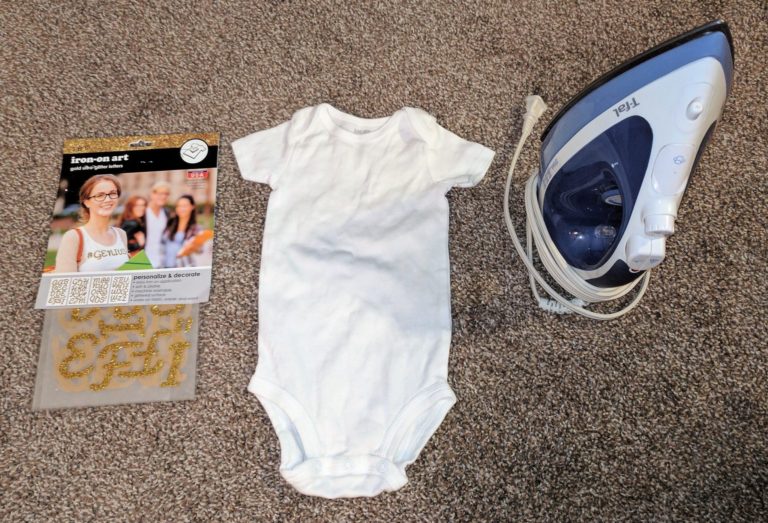
First, lay the letters on the onesie. Arrange them how you want them to look. Place the plastic paper, included in the package, on top of the letters.
Place the iron on the letters and plastic according to package instructions. Let sit for desired amount of time. Make sure to not use any steam.
Remove the iron and look at what you have! An adorable outfit. Buy some gold shorts, shoes, and a gold bow and you have an entire outfit!
To make things even a little more fun, I created a separate outfit for her to wear while doing her smash cake. I made it the same way I did the DIY one onesie. The only difference is that you will not be able to iron on the letters all at once. It matched our gold theme and we didn’t care if she ruined it or not. After she was done, we took it off, and put her original outfit back on. Fun for everyone and I still have her first outfit to save!
If you want to see another idea for baby’s first birthday, go here. Stay tuned for more ideas to come!