Harry Potter Onesie – Quick and Easy DIY With Fabric Paint – No Cricut!
This post may contain affiliate links, which means I’ll receive a commission if you purchase through my links, at no extra cost to you. Please read full disclosure for more information.
I wanted to stage a themed picture of baby girl with the Harry Potter and the Cursed Child book. Therefore, I set to making her the perfect outfit for my baby girl…a DIY Harry Potter onesie. It was surprisingly simple to make. Even though I was largely disappointed with the book, that wasn’t going to stop me from making the perfect picture outfit to create memories for ages to come.
As a note, I don’t own a Cricut, so this tutorial uses fabric paint rather than a Cricut and vinyl.
We love Harry Potter!
We are a big Harry Potter household, so I was naturally very excited about the recent release of the Harry Potter script and then the new Fantastic Beasts movie! I’ve been reading Harry Potter since middle school, so I’m excited that 20 or so years later, the franchise is still going strong. Maybe it will still be flourishing when my daughters are old enough to enjoy the Harry Potter universe.
I own every one of the movies. Mostly in DVD format, because we didn’t have a Blu-Ray player for most of the releases! Also, I own every book that’s come out…and all the auxiliary books as well that aren’t part of the main series. Our house is even decorated with a “Free Dobby” decor sign to store missing socks in the laundry room, and for my birthday, my sister gave my daughter and me matching Harry Potter “mommy and me shirts.”
How to make a DIY Harry Potter onesie:
Onesie supplies:
First, you’ll need to collect your supplies for this Harry Potter onesie project.
- prewashed onesie (mine was sleeveless and from Carter’s.)
- fabric paint (make sure it is safe for babies! I used Puffy Paint.)
- tape for framing the design (I used my husband’s electrical tape.)
- a sponge brush (pick up a ton of these from Dollar Tree.)
- a piece of cardboard (upcycled diaper box, anyone?)
- scissors
- a lightning bolt outline (Google this and print an image scaled to fit your onesie size)

Instructions for making this DIY onesie:
Make Harry Potter’s lightning bolt outline:
To make the lightning bolt outline on the onesie, I first found a cartoon image of a lightning bolt using Google and enlarged it to the perfect size. Then, I printed it out on a white sheet of paper, cut the bolt out, and found the best place for it on the onesie.

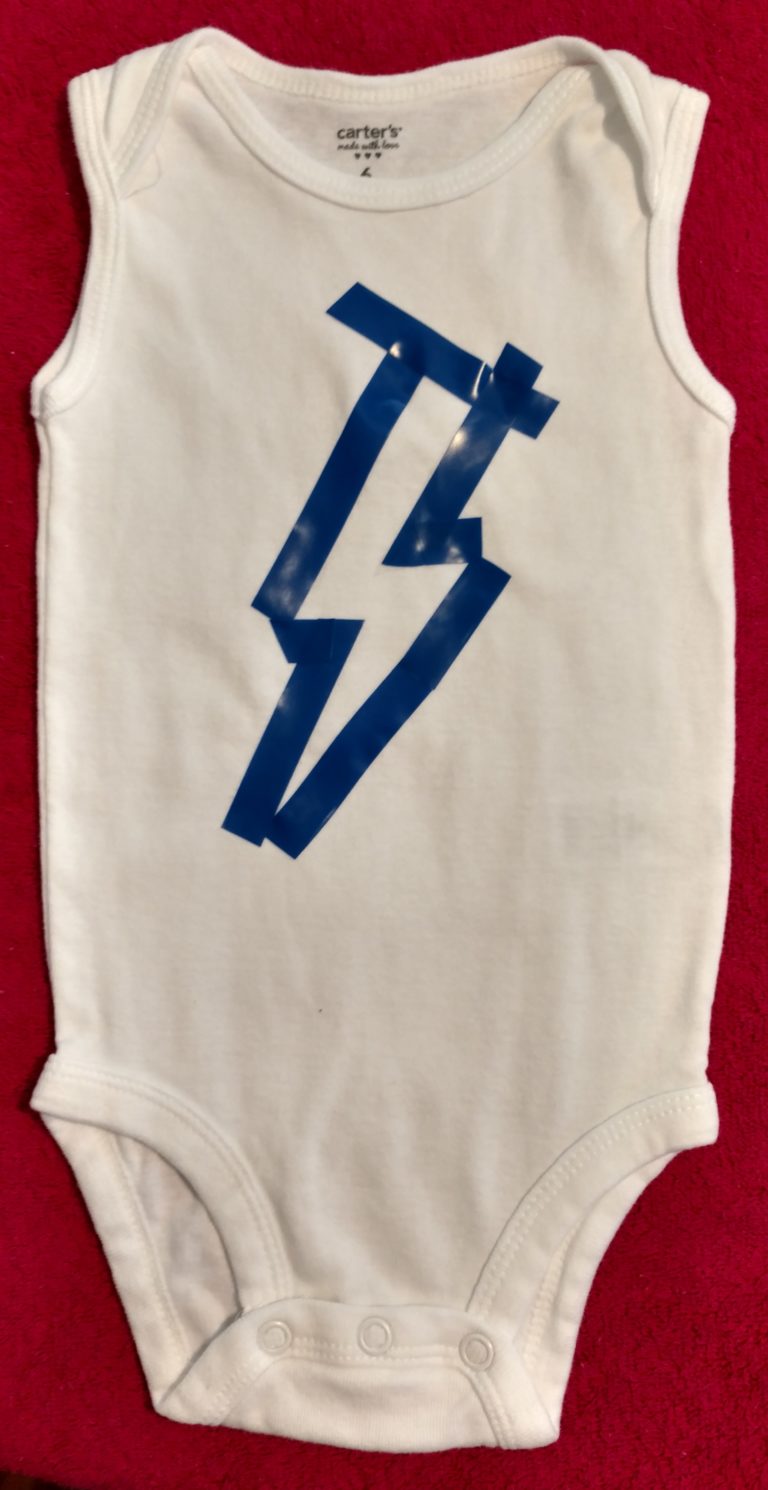
I lightly traced around it with a pencil, removed the paper pattern, and then taped the outline using the pencil marks as reference. The tape needs to be flush to the fabric or the paint will leak underneath it. Somewhere around the house there’s paint tape. All I could find was electrical tape, so it had to do for today. Here’s what the onesie looked like at this point:
Painting the Lightning Bolt
I first put a piece of cardboard inside the onesie to prevent any incidental leak through and to provide a flat, firm surface. Then, using the sponge foam brush, I dabbed on paint inside the taped lines. Make sure there are no paint bubbles at this point, or the surface won’t be even when it dries.
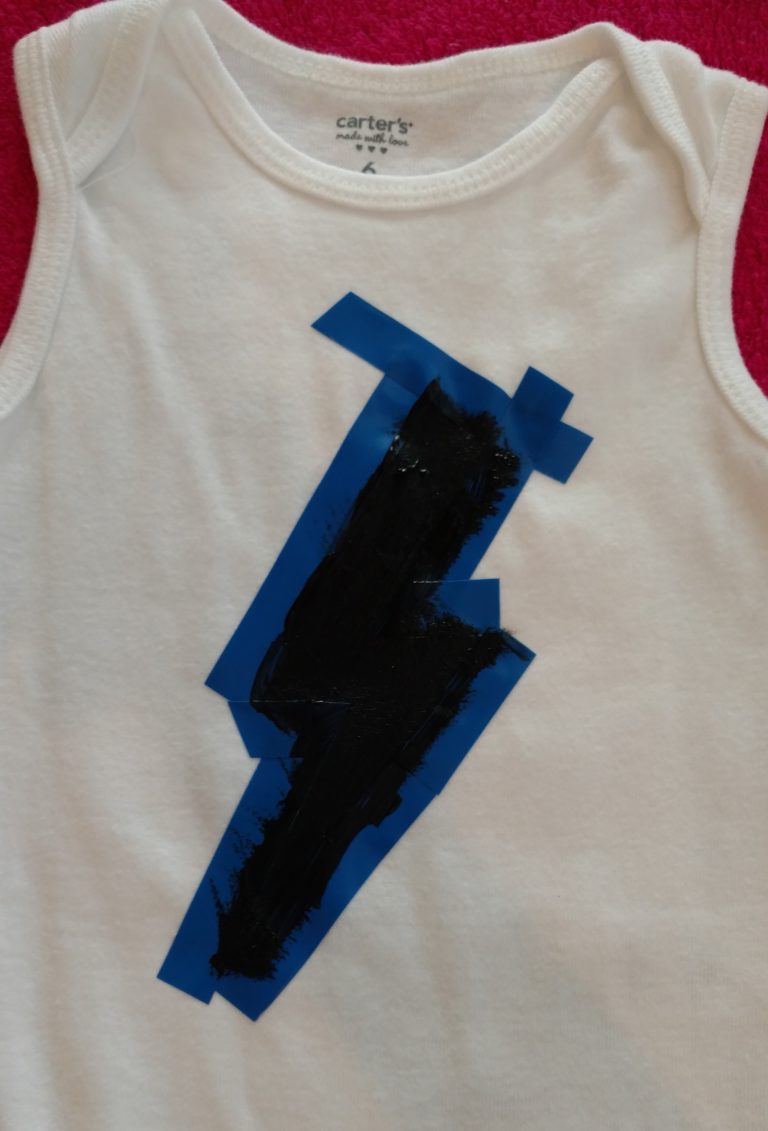
After letting the majority of the paint dry for a few minutes, I removed the tape and let the paint then fully dry overnight. I wanted to remove the tape soon and not take a chance it dried onto the Harry Potter onesie!
Here’s the finished onesie:

Now, that you’ve created your own lightning bolt onesie for baby, you can stage the perfect picture of your baby dressed with their Harry Potter onesie! A simple bath towel from high school and my collectibles all made the perfect decorations for my photoshoot. My daughter didn’t particularly like sitting in the cauldron, so the photoshoot didn’t last too long! The pictures we did get, though, were hilarious.

Check out some of our other onesie decoration ideas if you enjoyed this tutorial!
